In this walkthrough, I’m going to show you how to add information to the OpenStreetMap (OSM) database. When you contribute information to the OSM database, you're helping populate information to apps that rely on this data, like Craigslist, Gaia GPS, FourSquare, and many others. Let's get started!
A Brief Intro to OpenStreetMap
Finding an area to add
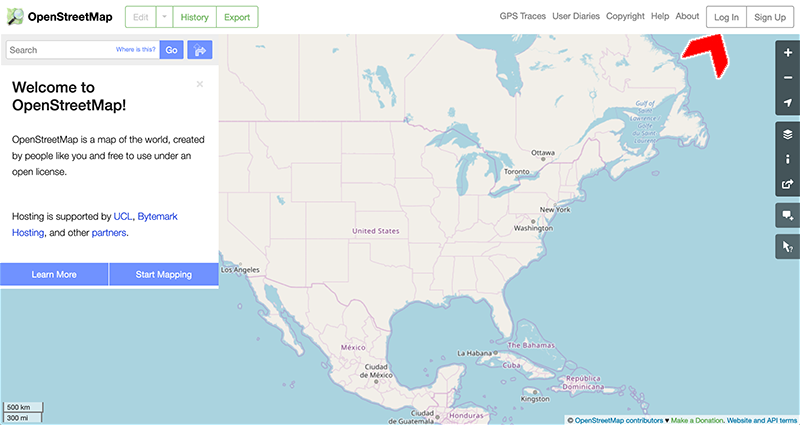
Start by navigating to openstreetmap.org and logging in to your account or creating an account if you don’t already have one. The Log In and Sign Up buttons are located in the top-right corner.
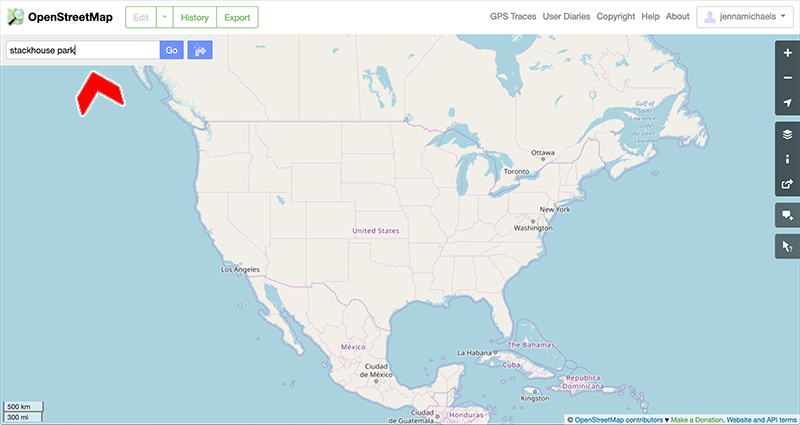
Once you’ve logged in, use the search bar in the top-left corner to search for the place you’d like to add. You can search for a location name, city, state, address, or zip code. In this walkthrough, we'll be adding information for various places around Johnstown, PA, starting with Stackhouse Park.
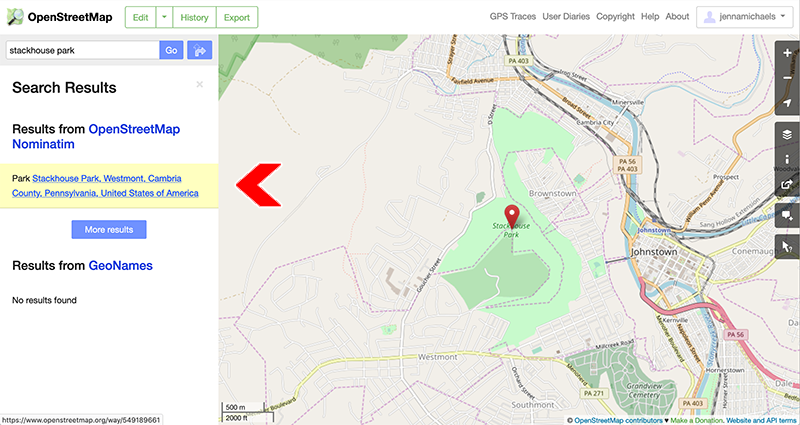
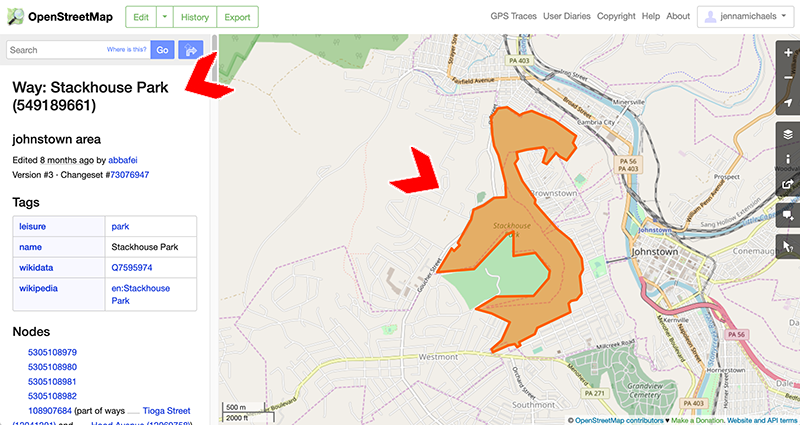
Click on the result to see information that has already been added by other users.
Adding and editing information
There are a few ways to edit information on OSM, as well as different types of features that can be added.
Ways to edit information
You can edit information from the comfort of your home, using the OSM satellite imagery—just be sure that the information you’re adding is accurate and up-to-date. You can also collect data as you are out in the world walking, hiking, riding your bike, etc. You can use a GPS to accomplish this.
Types of features to add
- Points: restaurants, monuments, parking lots, postal boxes, etc.
- Lines: highways, roads, walking paths, trails, canals, etc.
- Areas: parks, buildings, lakes, etc.

With the basics outlined, let’s start editing the map! Click the “Edit” button located in the top-left corner of the window. Bing satellite imagery with OSM data superimposed will populate the map window. Zoom in to the desired location to begin editing and adding features.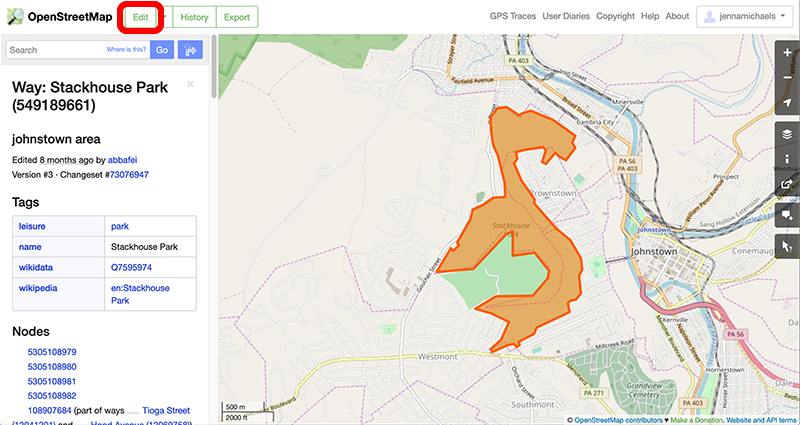
Adding a Point
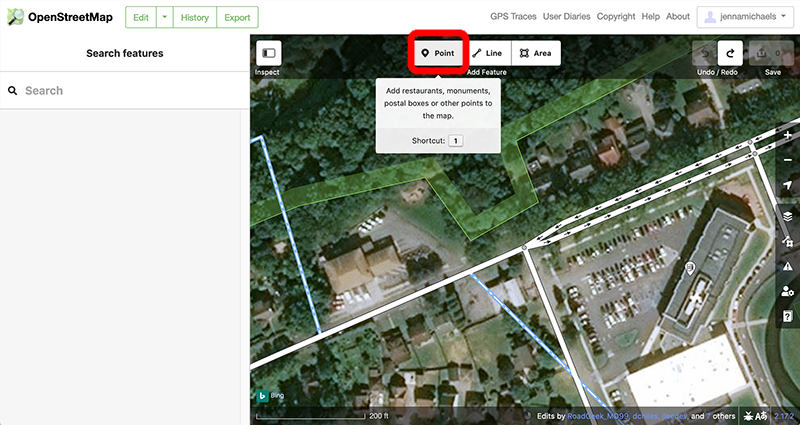
Let's start by adding parking lot information to Stackhouse Park.
Click the “Point” button located in the “Add Feature” menu in the top-center of the map window, then click roughly in the center of the parking lot area on the map.
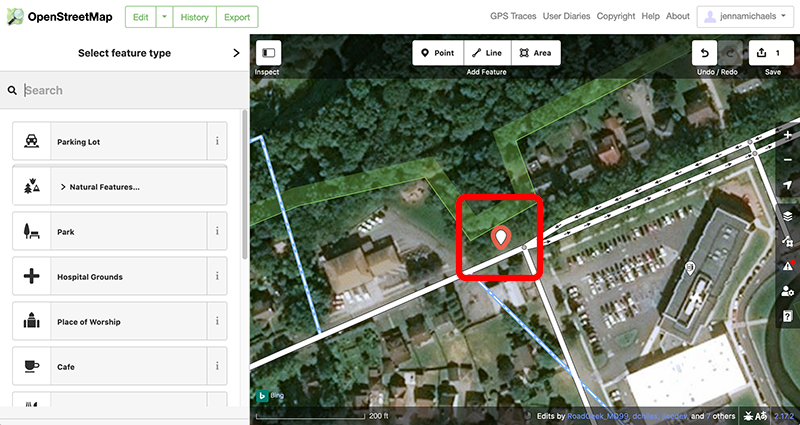
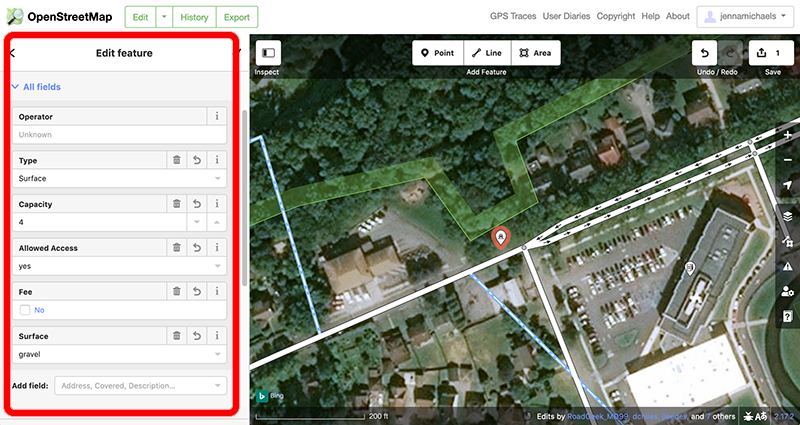
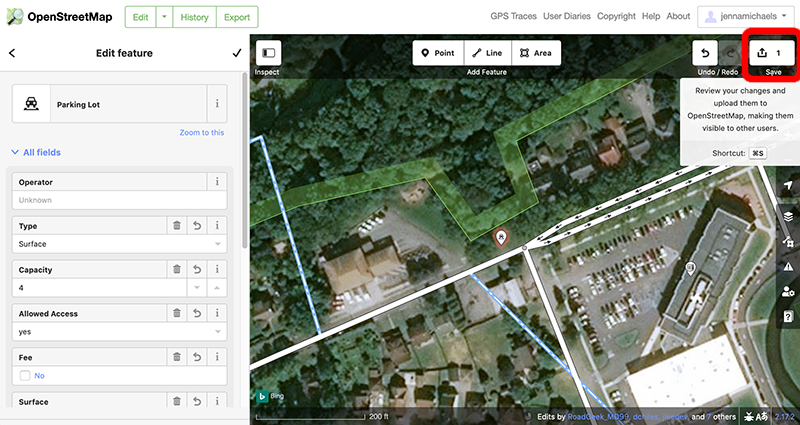
In the pane to the left, search for “parking lot,” select the “Parking Lot” option, and add additional known information (optional).

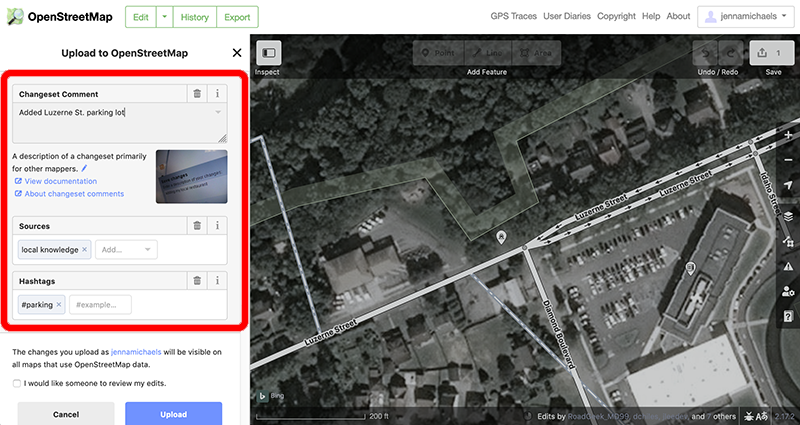
To save the information to OSM, click the “Save” button in the top-right corner of the window. Add a comment about your edit (i.e., why you made the edit), a source for the edit (i.e., where this information came from), and a hashtag.
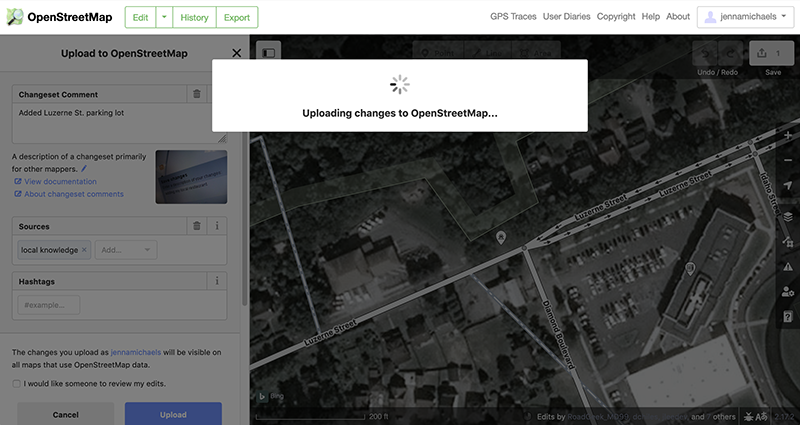
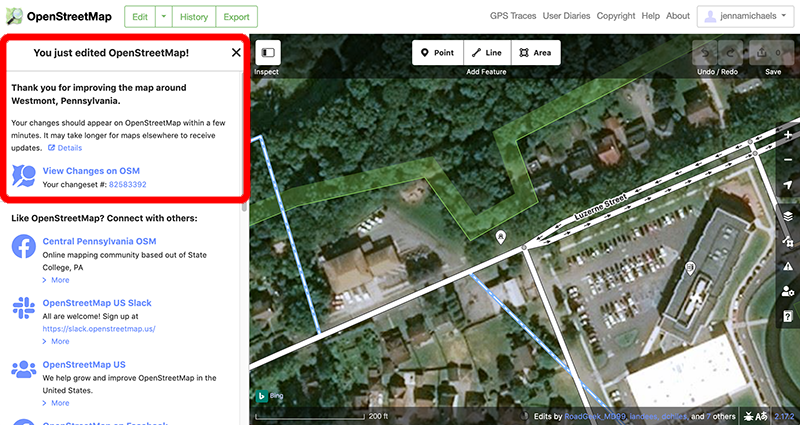
The data will now be published to the database for other users to interact with. It can take from a few minutes to a few hours to be added to the database. It can take longer for the information to be added to third-party apps that rely on the OSM database for information.
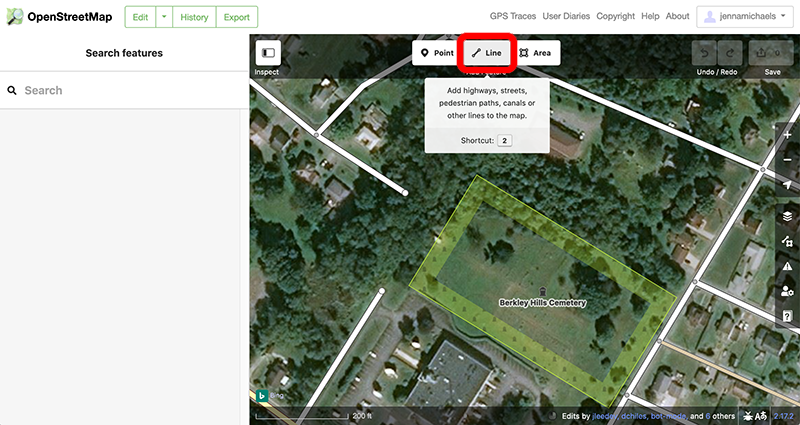
Adding a Line
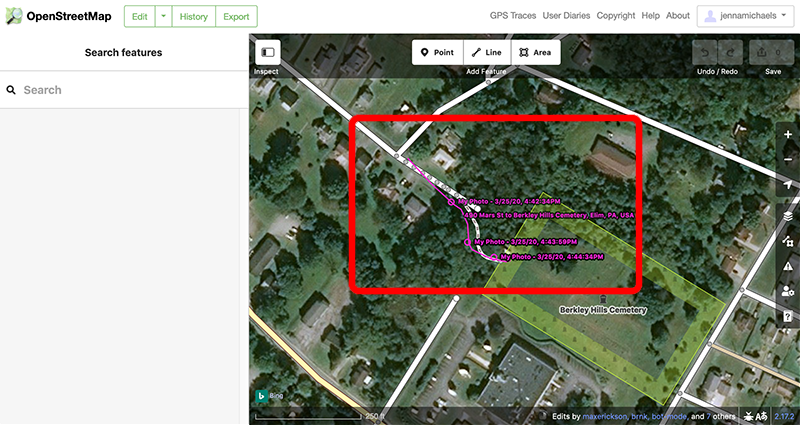
Next, we will add a small pedestrian path that connects a local cemetery to a neighborhood.
Zoom in to the cemetery area and click “Line” from the “Add Feature” menu in the top-center of the map window.
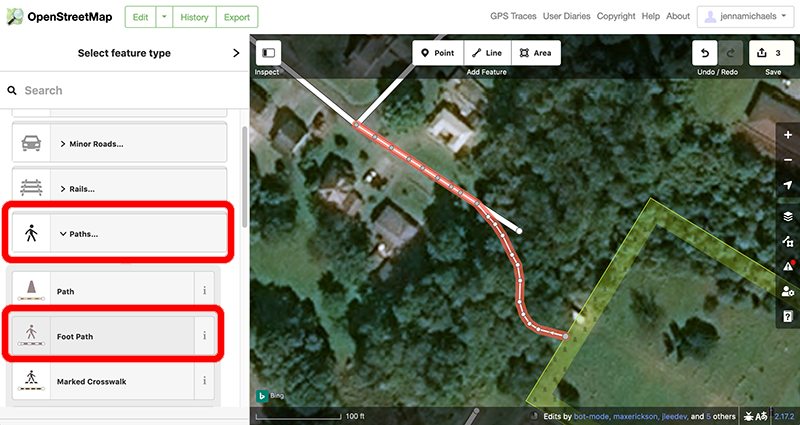
Trace the pedestrian path, connecting it from the cemetery to the road behind the cemetery. In the left pane, identify it as a Foot Path and add all of the known additional information.

Save your changes just as above in Add a Point.
Tracking for improved accuracy
On second thought, we should walk along that pathway, record the track with Gaia GPS and upload the track to OSM. This will improve accuracy, be more beneficial to other users, and allow us to gather additional information (like ascent/descent and altitude).
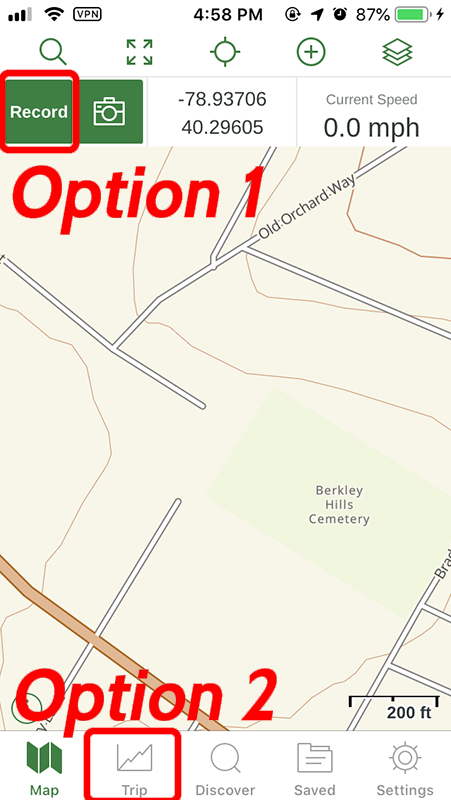
Tracking with Gaia GPS
In real life, make your way to the location where you want to start recording your track. Open the Gaia GPS app on your mobile device and tap the “Record” button in the top-left corner (your button might be in a different place if you’ve modified the original menu layout). You can also access the “Record” button from the “Track” page.
Start walking along the footpath/trail, and the app will begin recording your location. You can also take some photos along the way to document what the footpath looks like for other users.
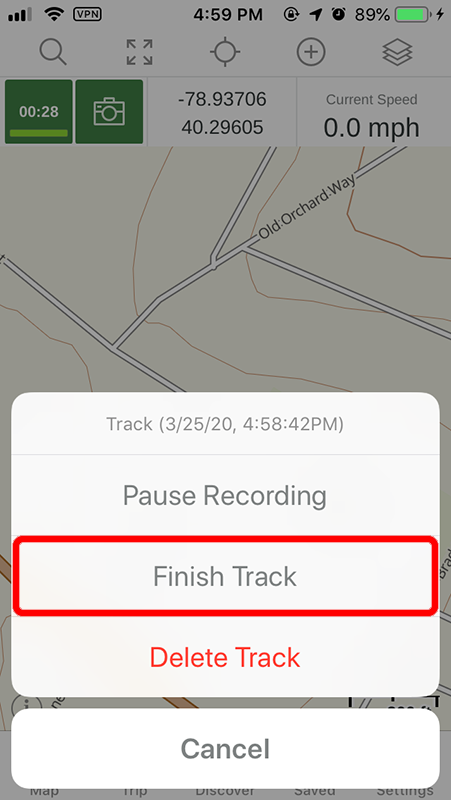
When you’ve reached the end of the footpath, tap the “Record” button again (which has now changed to a running timer) and tap “Finish Track”. You can also pause or delete the recording if needed.
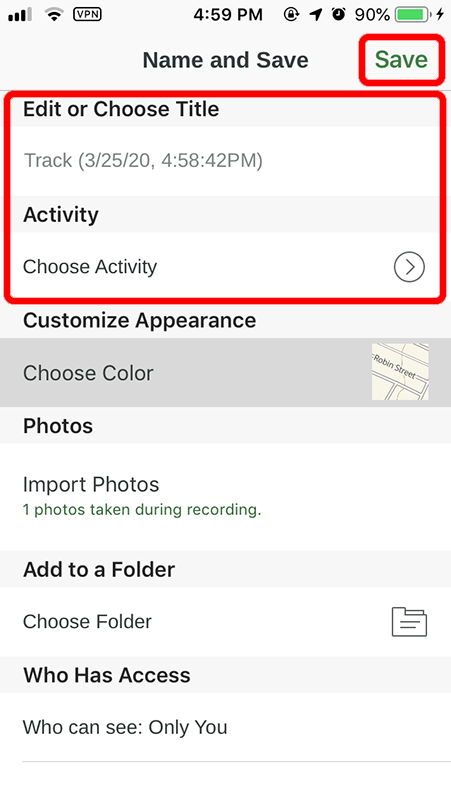
Edit the recorded track information, like the title and activity, and tap "Save" in the top-right corner. You can export the GPX file from the app or download it directly from the Gaia GPS website on your computer.
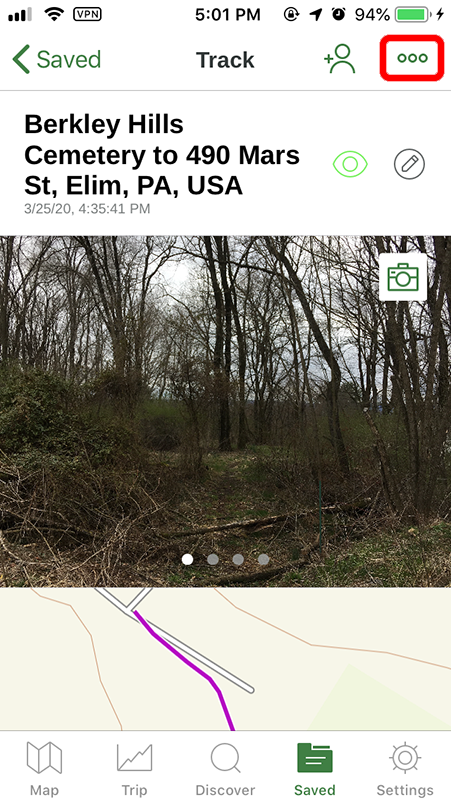
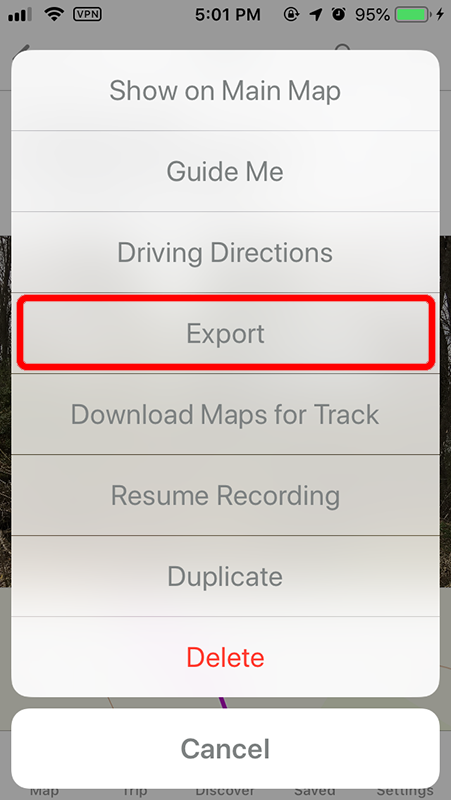
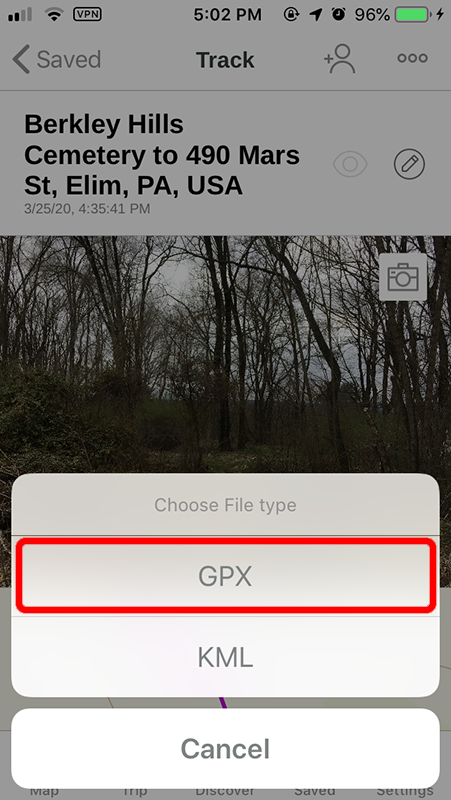
To export from the app, tap on the three dots in the top-right corner of the app. Tap “Export”, then tap “GPX” as the file format. Choose how you’d like the file exported (for example, email it to yourself).
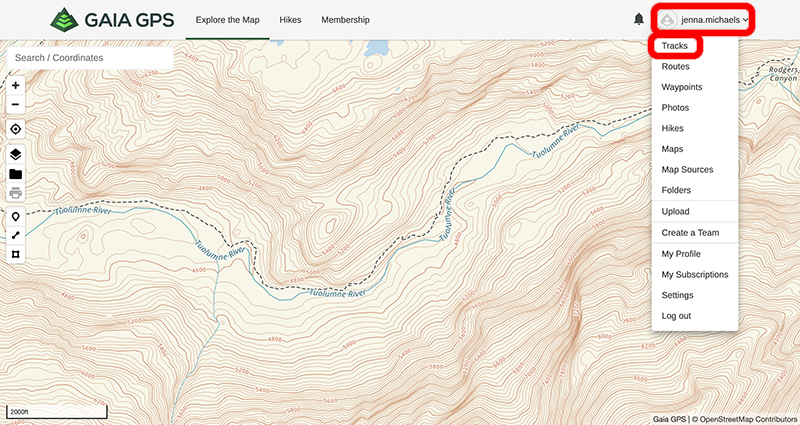
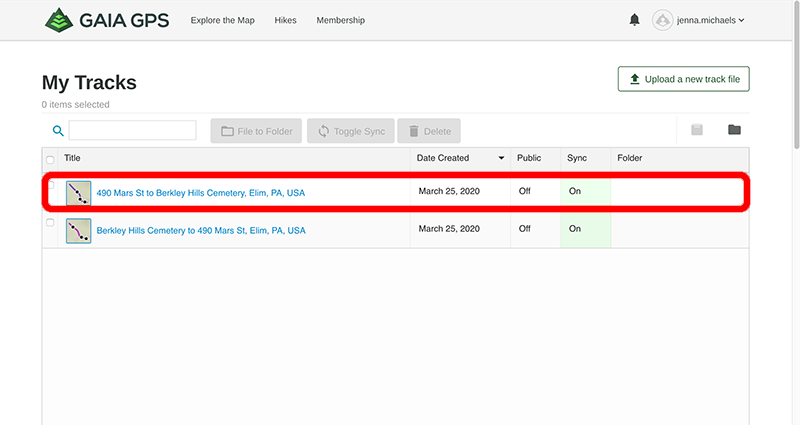
To download the GPX file from GaiaGPS.com, log in, hover over your username, and click on “Tracks” to see all of your recorded tracks.
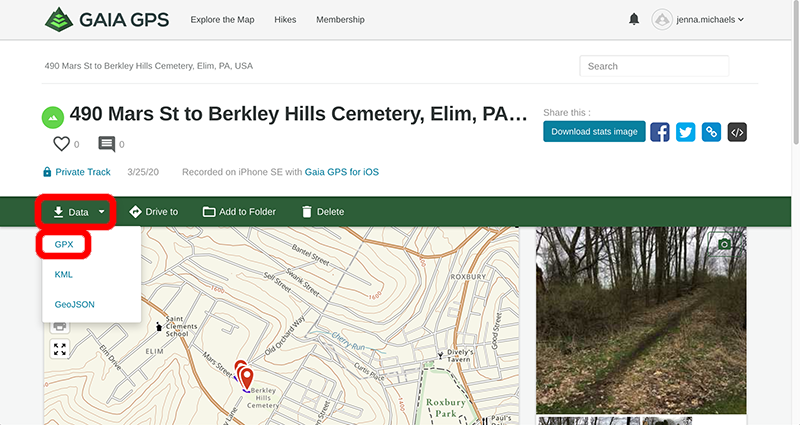
Click on the track you want to download and select “GPX” from the “Data” dropdown menu. This will download the GPX file to your computer.
Uploading the track to OSM
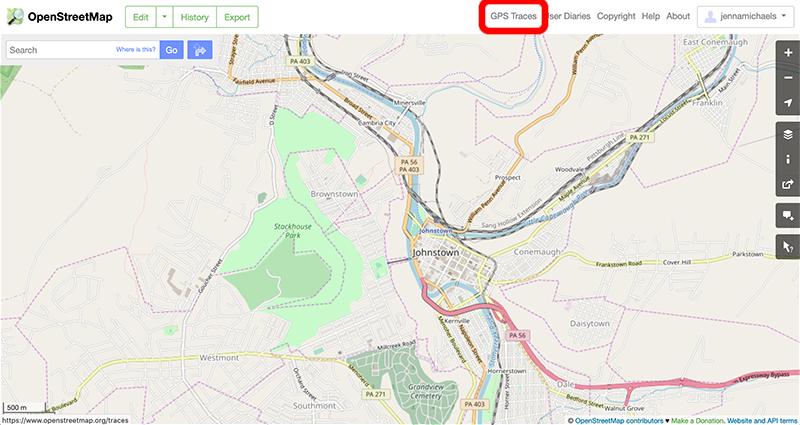
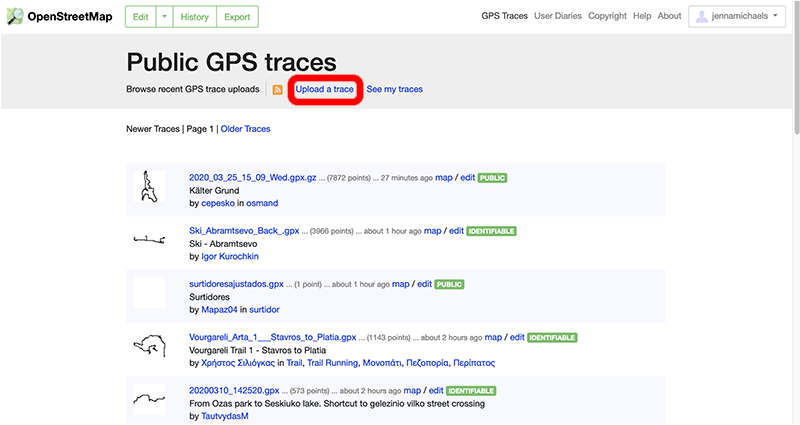
Log in to OpenStreetMap and click “GPS Traces” at the top of the screen.
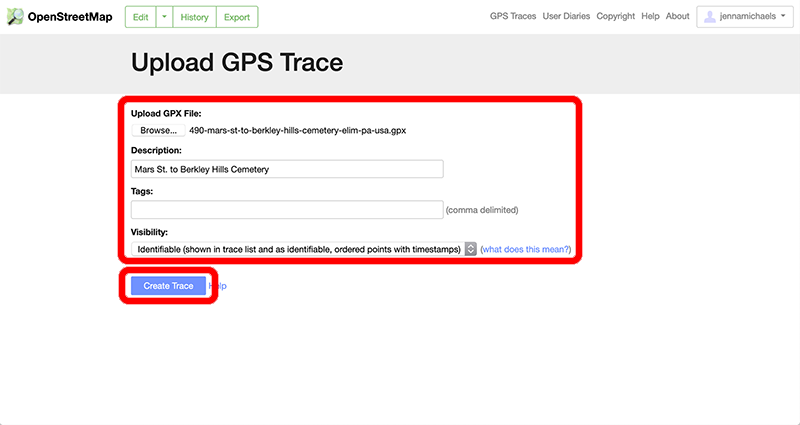
On the Public GPS Traces page, click the “Upload a trace” link. Browse to the GPX file on your computer, edit the information, and click the “Create Trace” button.
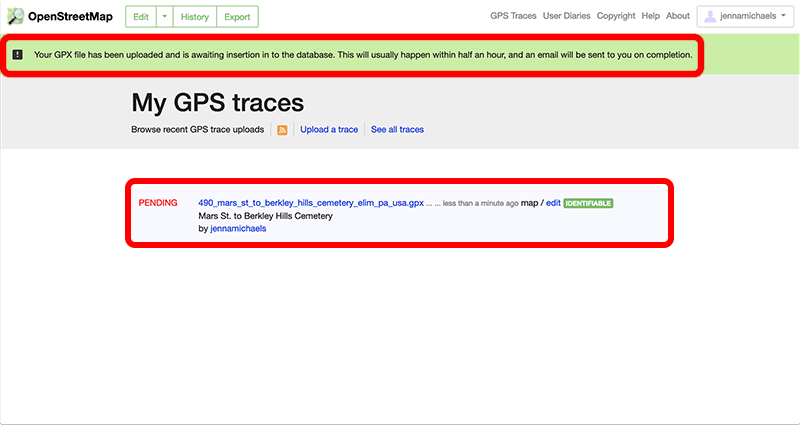
If your upload was successful, you will receive the following message and see that the upload is marked as "PENDING". It will take a few moments for the file to be uploaded to the OSM database, and you will receive an email once it has been added.
Tracing your GPX file
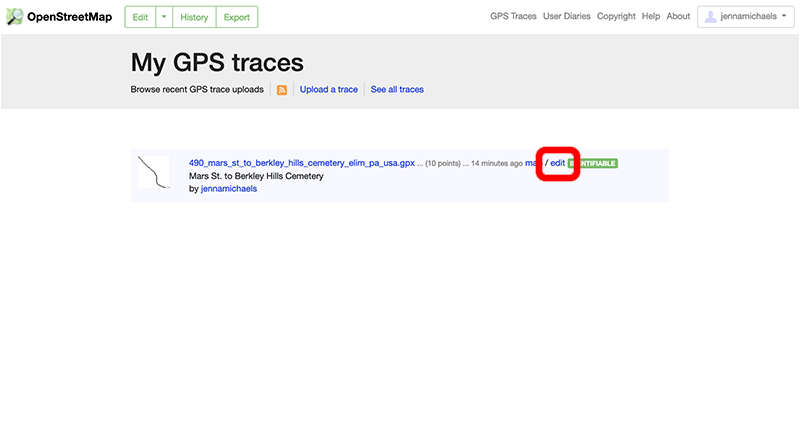
Access your uploaded GPX file on OSM by navigating to your profile and clicking “My Traces,” then click “edit” next to the Description of the trace you want to add to the map. This will open the OSM map with your GPX file superimposed.
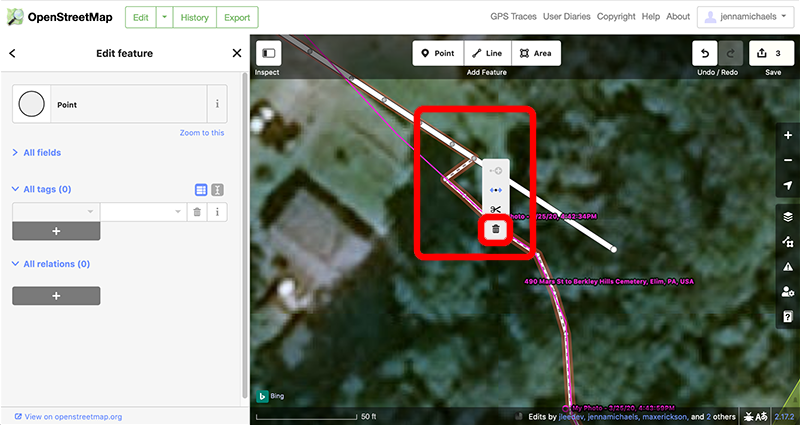
Previously, we traced the footpath manually, but we need to adjust the traced line to more accurately reflect the GPX file. Left-click on points along the old line and drag them to line up with the superimposed GPX file.
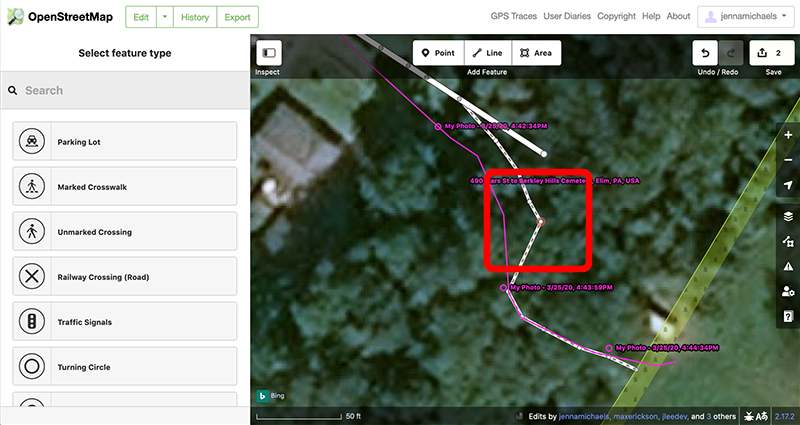
You can delete unnecessary points on the original trace by left clicking on the point, then right clicking and selecting the trash can icon from the menu. Take care to not delete points that other users have added to the map.
After cleaning up the trace to match the GPX information, you can save your changes just as above in Add a Point.

Adding an Area
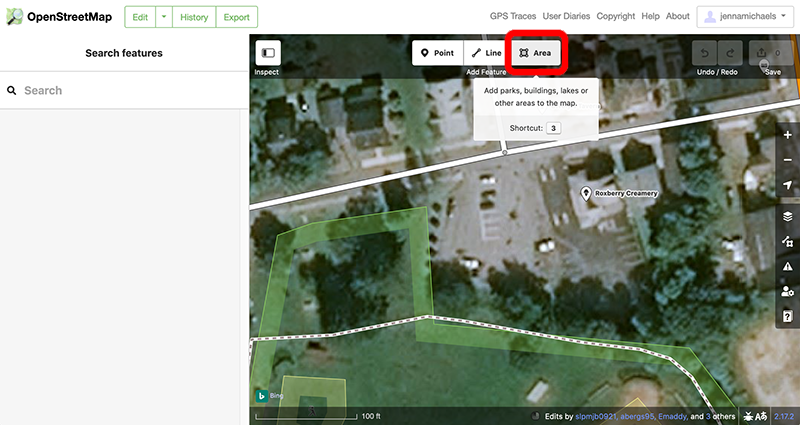
Lastly, let's add information for a local recycling collection center located near Roxbury Park, a local neighborhood park.
Zoom in to Roxbury Park, find the recycling center, and click “Area” from the “Add Feature” menu in the top-center of the map window.
Trace around the recycling center by left-clicking around the area you want to select.
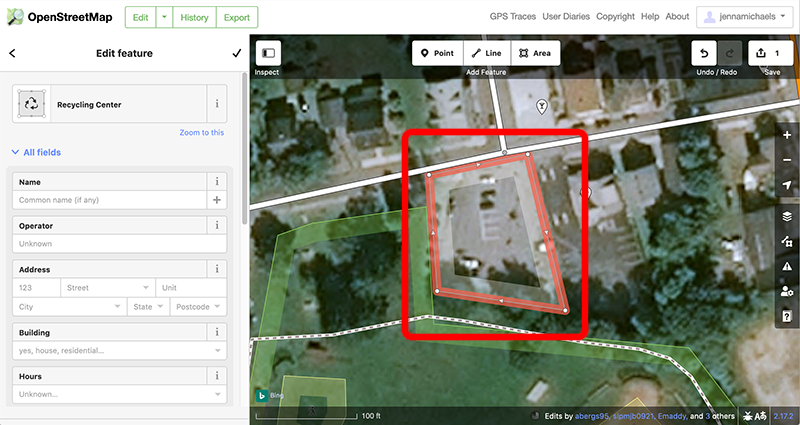
In the left pane, search for “recycling” and select “Recycling Center” from the results. Add all of the additional, relevant information.
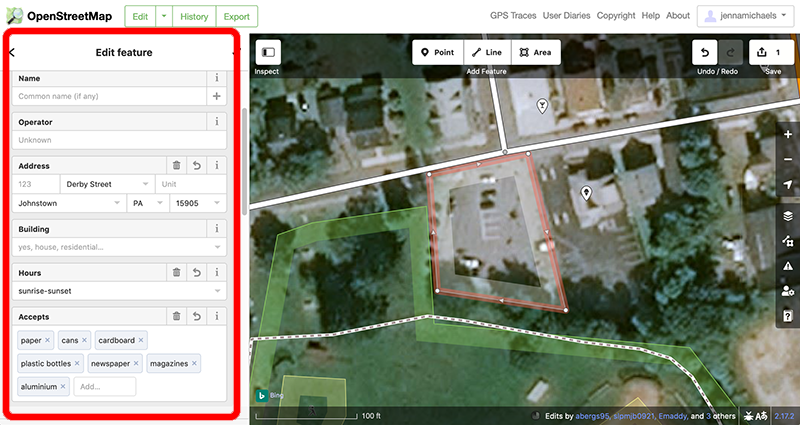
Save your changes just as above in Add a Point.
For more information on editing the OpenStreetMap database, please see the OSM Beginners' Guide, the OSM Wiki, or browse the many YouTube tutorials uploaded by OSM users. Happy mapping!